
Table of Contents
- DIY Candle Making Supplies List: What You'll Need to Get Started
- Step-by-Step: How to Make Custom Scented Candles at Home
- Candle Fragrance Oil Ratios: How Much Scent Is Enough?
- How to Cure Homemade Candles for Maximum Scent Throw
- Common Candle Making Mistakes and How to Fix Them
- Sustainable Wax Options for Custom Scented Candles
- DIY vs. Store-Bought Candles: A Cost-Benefit Analysis
- Frequently Asked Questions
Last Updated: September 28, 2026
DIY Candle Making Supplies List: What You'll Need to Get Started
Making custom scented candles at home starts with a short supply list: wax, wicks, fragrance, vessels, and tools that keep temperatures predictable. This guide covers every step, plus the ratios and fixes most tutorials skip.
Here's the core kit:
- Wax: soy, beeswax, paraffin, or a blend
- Wicks: cotton, sized to your vessel diameter
- Fragrance oils: skin-safe, candle-grade
- Vessels: heat-safe glass, tins, or ceramic
- Double boiler or pouring pitcher
- Thermometer: candy or infrared
- Scale: measures wax and oil by weight
- Wick centering tool or wooden skewers
- Heat gun for smoothing tops
Step-by-Step: How to Make Custom Scented Candles at Home
The process takes about 90 minutes of active work, plus 24 to 48 hours of curing.
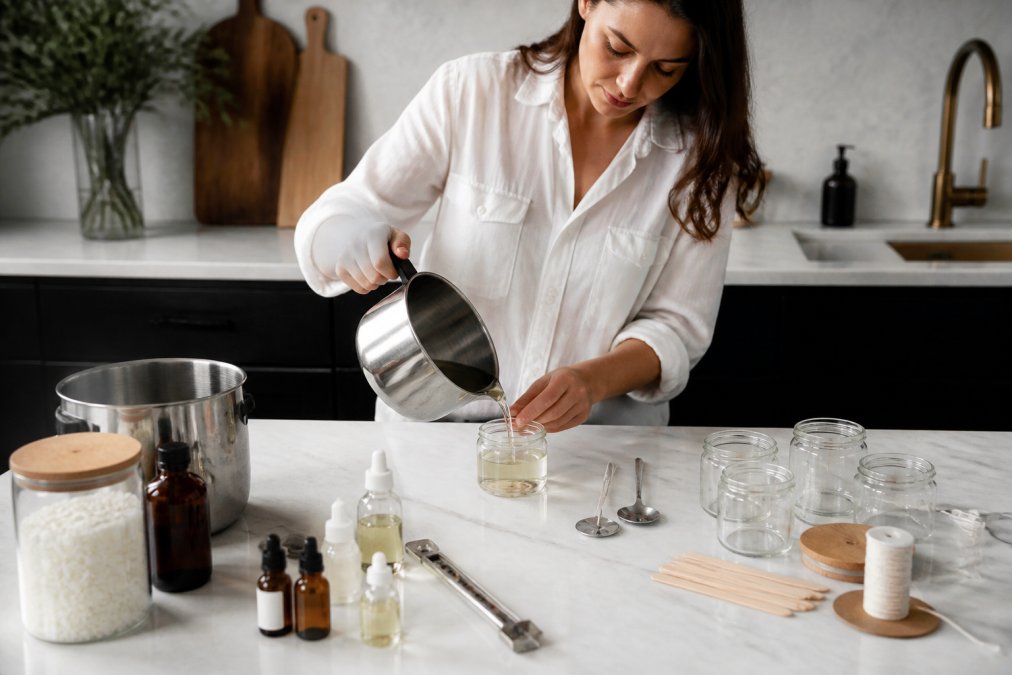
Step 1: Prep Your Vessel and Workspace
Wash each jar with warm soapy water, dry fully, then wipe the inside with rubbing alcohol, oil residue stops wax from adhering to glass.
Step 2: Melt and Blend Your Wax
Weigh your wax on a scale, not by eye. Melt over medium heat, stirring slowly: soy wax melts around 170-180°F, beeswax closer to 185°F.
Step 3: Add Fragrance and Pour
Add fragrance oil at 135-140°F, right before pouring, and stir two full minutes so it binds with the wax instead of separating.
Candle Fragrance Oil Ratios: How Much Scent Is Enough?
Fragrance load is the variable most home makers get wrong. "Use 6-10%" is only a starting point, the real ceiling depends on your wax, wick, and the oil's chemistry.
Fragrance Load by Wax Type
| Wax | Typical Load Range | Notes |
|---|---|---|
| Soy (100%) | 6-8% | Higher loads often weep oil; soy has a lower saturation point |
| Soy blend | 6-10% | Paraffin content raises the ceiling |
| Paraffin | 6-10% | Tolerates higher loads but can soot above 10% |
| Beeswax | 5-6% | Dense crystal structure resists absorption; overloading causes surface oil |
| Coconut | 6-8% | Similar to soy; prone to frosting at high loads |
A common pattern: makers push to 10% on 100% soy, get a greasy top after cure, and blame the oil. The wax was already saturated. Drop to 7% and cure longer.
Why the Ceiling Exists: Saturation and Wick Starvation
Wax can only hold so much oil in suspension. Past that point:
- Oil migrates to the surface, a slick or beads on top after cure.
- The wick starves, excess oil floods the capillary action, the flame shrinks, and you get a drowned wick or soot.
- Scent throw drops, more oil can mean less scent because the wick can't vaporize it efficiently.
Flash Point: What It Actually Means for Pouring
Flash point is the temperature at which an oil gives off enough vapor to ignite with an ignition source, not the temperature at which it burns in your candle. It matters for two reasons:
- Pour temperature interaction. If your oil's flash point is below your pour temperature, you'll lose top notes to evaporation before the candle cures. Add low-flash-point oils (many citrus and light florals) at 130-135°F and stir gently.
- Storage and shipping. Low-flash-point oils degrade faster in heat. Store them in a cool, dark cabinet, not above the stove.
Essential Oils vs. Fragrance Oils: The Real Trade-Off
Essential oils are not a drop-in substitute: they're volatile, vary batch to batch, and many have flash points low enough to evaporate during the pour. Some, like citrus oils, are phototoxic. Candle-grade fragrance oils are engineered for thermal stability and consistent throw.
Quick Reference Table
| Wax Weight | 6% Load | 8% Load | 10% Load |
|---|---|---|---|
| 8 oz | 0.48 oz | 0.64 oz | 0.80 oz |
| 16 oz | 0.96 oz | 1.28 oz | 1.60 oz |
| 32 oz | 1.92 oz | 2.56 oz | 3.20 oz |
Round to the nearest 0.1 oz on a 0.01 oz resolution scale. Small errors compound across a batch.
How to Cure Homemade Candles for Maximum Scent Throw
Curing lets fragrance bind fully with wax. Skip it and your candle smells weak even with a perfect pour, most soy candles need 1-2 weeks to reach full scent throw.
Common Candle Making Mistakes and How to Fix Them
Most candle defects come from one variable being off, wick size, pour temperature, cooling rate, or cure time. Read the symptom, apply the fix, then re-test with a fresh candle.
Diagnostic Table
| Symptom | What You See | Most Likely Cause | Fix |
|---|---|---|---|
| Tunneling | Wax ring left on the jar wall, wick burns straight down | Wick too small for vessel diameter, or first burn too short | Size up one wick step; burn 2-3 hours on first light so the melt pool reaches the edge |
| Mushrooming | Carbon ball on the wick tip, soot on the jar | Wick too large, or fragrance load too high | Size down one wick; trim to 1/4 inch before every burn; verify load is within wax ceiling |
| Sinkholes | Crater or dip on the top surface after cooling | Fast, uneven cooling | Pour at lower end of window; cool on a wire rack away from drafts; top off with a heat gun pass |
| Wet spots / oil beads | Slick or greasy patches on top | Fragrance load above wax saturation point | Reduce load by 1-2%; extend cure; check oil is candle-grade |
| Frosting | White crystalline film on soy candles | Temperature swings during cure, or natural soy polymorphism | Cure in a stable cool room; a light heat gun pass can reset the surface |
| Poor adhesion | Wax pulling away from glass | Dirty or cold vessel | Wash with soap and water, wipe with rubbing alcohol, warm the vessel slightly before pouring |
| Weak hot throw | Candle smells fine cold, faint while burning | Under-cured, wick too small, or load too low | Cure 1-2 weeks for soy; size up wick; raise load within wax ceiling |
| Weak cold throw | Candle barely smells unlit | Low load, or oil with poor cold-throw profile | Raise load 1%; switch to an oil with strong cold throw for the scent family |
| Cracked top | Hairline cracks across the surface | Cooled too fast, or poured too hot | Slow the cooling; pour at the lower end of the window |
| Soot on jar | Black film on glass | Wick too large, wick too long, or draft | Trim wick; size down; move candle out of air currents |
The Burn Test: How to Actually Diagnose a Candle
You cannot judge a candle by looking at it. You have to burn it. A proper burn test takes three sessions:
- First burn (2-3 hours). Let it burn until the melt pool reaches the vessel edge, usually 2-3 hours for a 3-inch jar. If it doesn't reach the edge in 3 hours, your wick is too small. If it reaches the edge in under an hour with a tall, flickering flame, your wick is too large.
- Second burn (2-3 hours, next day). Trim the wick to 1/4 inch first. Watch for mushrooming, soot, and an even melt pool. A healthy flame is roughly 1 inch tall and steady.
- Third burn (2-3 hours). By now you'll see the true hot throw. If it's still weak on a properly cured candle, the problem is load or wick, not cure.
Wick Sizing: The Variable That Causes Half of All Defects
Wick sizing is not one-size-fits-all. Supplier charts are starting points, not answers, because they assume a specific wax and fragrance load. Three adjustments matter:
- Vessel diameter. A 3-inch jar needs a larger wick than a 2-inch tin, even with the same wax.
- Wax type. Beeswax and coconut wax need larger wicks than soy for the same diameter because they're denser.
- Fragrance load. Higher loads need slightly larger wicks, but only up to the wax's saturation point. Past that, a larger wick just soots.
Temperature Discipline
Two temperatures control most outcomes:
- Melt temperature. Soy: 170-180°F. Beeswax: 185°F. Paraffin: 180-185°F. Stir slowly; don't rush with high heat.
- Pour temperature. Soy blends: 135-145°F. Add fragrance at 135-140°F and stir two full minutes. Pouring too hot causes sinkholes and cracks; too cold causes uneven tops and poor adhesion.
A $15 infrared or candy thermometer removes the guesswork. If you're eyeballing temperature, you're guessing at every other variable too.
Cure Time Is Not Optional
Soy candles need 1-2 weeks of cure for full scent throw; beeswax and paraffin cure in 3-5 days. Curing is not cooling, cooling is hours, curing is days. Store cured candles lidded, in a cool dark spot, away from windows and heat vents.
Sustainable Wax Options for Custom Scented Candles
Wax choice shapes burn time, scent throw, and how the candle feels at home. Each type has real trade-offs, so pick based on what you value most.
- Soy wax: plant-based, clean burn, slower cure, softer tops
- Beeswax: natural, subtle honey scent, firm, longer burn
- Paraffin wax: strong scent throw, cheaper, petroleum-based
- Wax blend: combines soy and paraffin for balance
DIY vs. Store-Bought Candles: A Cost-Benefit Analysis
DIY wins on customization and per-candle cost over time; store-bought wins on convenience, consistency, and scent variety. The right choice depends on how often you burn candles and how much you enjoy the process.
Frequently Asked Questions
How can I create a custom candle scent?
To create a custom candle scent, start by choosing a base note, middle note, and top note from fragrance oils. A common ratio is 50% base, 30% middle, and 20% top. For example, combine vanilla (base), lavender (middle), and bergamot (top). Test small batches using 1 oz of fragrance oil per pound of wax, and adjust based on your preference. Let the candle cure for 1-2 weeks to allow the scent to fully develop.
What is the 84 rule for candles?
The 84 rule is a guideline for fragrance oil usage: 0.84 oz of fragrance oil per pound of wax, which equals about 6% fragrance load. This is a safe starting point for most waxes, especially soy. However, some waxes can hold up to 10% (1.6 oz per pound). Always check your wax manufacturer's recommendation. Using too much oil can cause sweating, poor burn, or wick clogging.
What do I need to make my own scented candles?
You'll need wax (soy, beeswax, or paraffin), fragrance oils, wicks with tabs, a melting pot or double boiler, a thermometer, a pouring pitcher, and candle vessels. Optional but helpful: a wick centering tool, a heat gun for smoothing tops, and a scale for precise measurements. A DIY candle making supplies list should also include stir sticks and a fire extinguisher for safety.
Is it cheaper to make your own candles or buy them?
Making candles at home can be cheaper per candle after the initial investment in supplies. For example, a pound of soy wax costs about $5-$10 and makes roughly two 8 oz candles. Fragrance oil and wicks add $2-$3 per candle. Store-bought candles of similar quality often cost $15-$30. However, DIY requires time and equipment, so factor that in. For occasional use, buying may be more cost-effective.